
Unlike other handheld transceivers, the low cost Baofeng handhelds don’t have a 12V charging input, but use a charger cradle which contains the charging electronics. This tends to break down, or can be lost. Hence I designed simple, low cost, easy to buid charging electronics to use a 12V unversal power supplay (“wall wart”) to charge its Li-Ion battery.
We had the problem that a few of our charging stations for our Baofeng handheld radios failed (sometimes just the station, sometimes also the power supply), probably because of manufacturing problems, and perhaps also because the radios were left on during charging. Leaving the radios on during charging confuses the charger and leads to charging/discharging cylces, which wears out the battery and perhaps also overloads the charging circuit. Hence we need a replacement for the charging station and power supply. The battery of the Baofeng has 2 Li-Ion cells, with 1800 mAh, and 7.4V nominal voltage.
A good description of the charging strategy for Li-Ion batteries can be found here: http://batteryuniversity.com/learn/article/charging_lithium_ion_batteries There you find: “The advised charge rate of an Energy Cell is between 0.5C and 1C”, where in our case C = capacity/h= 1800 mA. Hence we need a charging current between about 900 mA and 1.8A. In its Fugure 1 you can also see the charging stages: Stage 1 charges up to 4.2V per cell, hence for our 2 cells up to 8.4V. At stage 1, 70-80% of capacity is reached. After reaching this voltage, stage 2 begins, with constant voltage and a tapering off current. When the current falls below 3% of C in stage 2, full capacity is reached.
Hence in principle we could charge our battery with a lab power supply, set it to 8.4V and current limit of e.g. 900mA, and let it charge for about 2 hours.
To be independent of a lab power supply, our goal is a simple circuit for charging the Li-Ion battery, quickly and inexpensive to build, which can be used with a small inexpensive universal power supply between about 10V and 12V, with about 500mA to 1A. Hence we can limit ourselves to the phase 1, where we can reach about 80% of capacity. For phase 1 we only need a charging current below 1.8 A, which stops when 8.4V are reached. An indication of the charging current would also be useful, to know when charging has finished.
 Charger Schematic
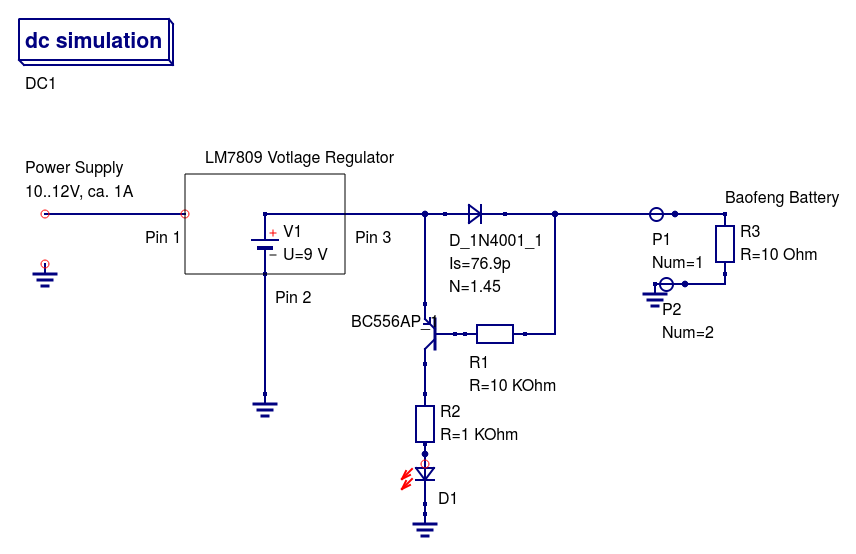
Circuit Diagram Description
The figure shows the simple circuit diagram. It consists of an LM7809, 9 volt linear voltage regulator, followed by a 1N4001 diode, to reduce the voltage to 8.3V, and to cut off the current once the charge voltage of 8.3 to 8.4 volts is reached. To indicate the charging current, the PNP transistor BC556 is used, with its Bas-Collector diode in series with a 10 kOhm resistor in parallel to the 1N4001 diode. The collector delivers current via a 1 kOhm resistor to a red LED towards ground. The transistor delivers current to the LED as long as the voltage across the 1N4001 diode is about 0.7 volts, which is the case for currents through the 1N4001 above about 10 mA. This can be seen in Fig. 2 of the 1N4001 data sheet, https://www.diodes.com/assets/Datasheets/ds28002.pdf. Observe that the 10 Ohm resistor is only a model of the battery, in reality it is not there. All together these parts can be purchased for less than 1 Euro!
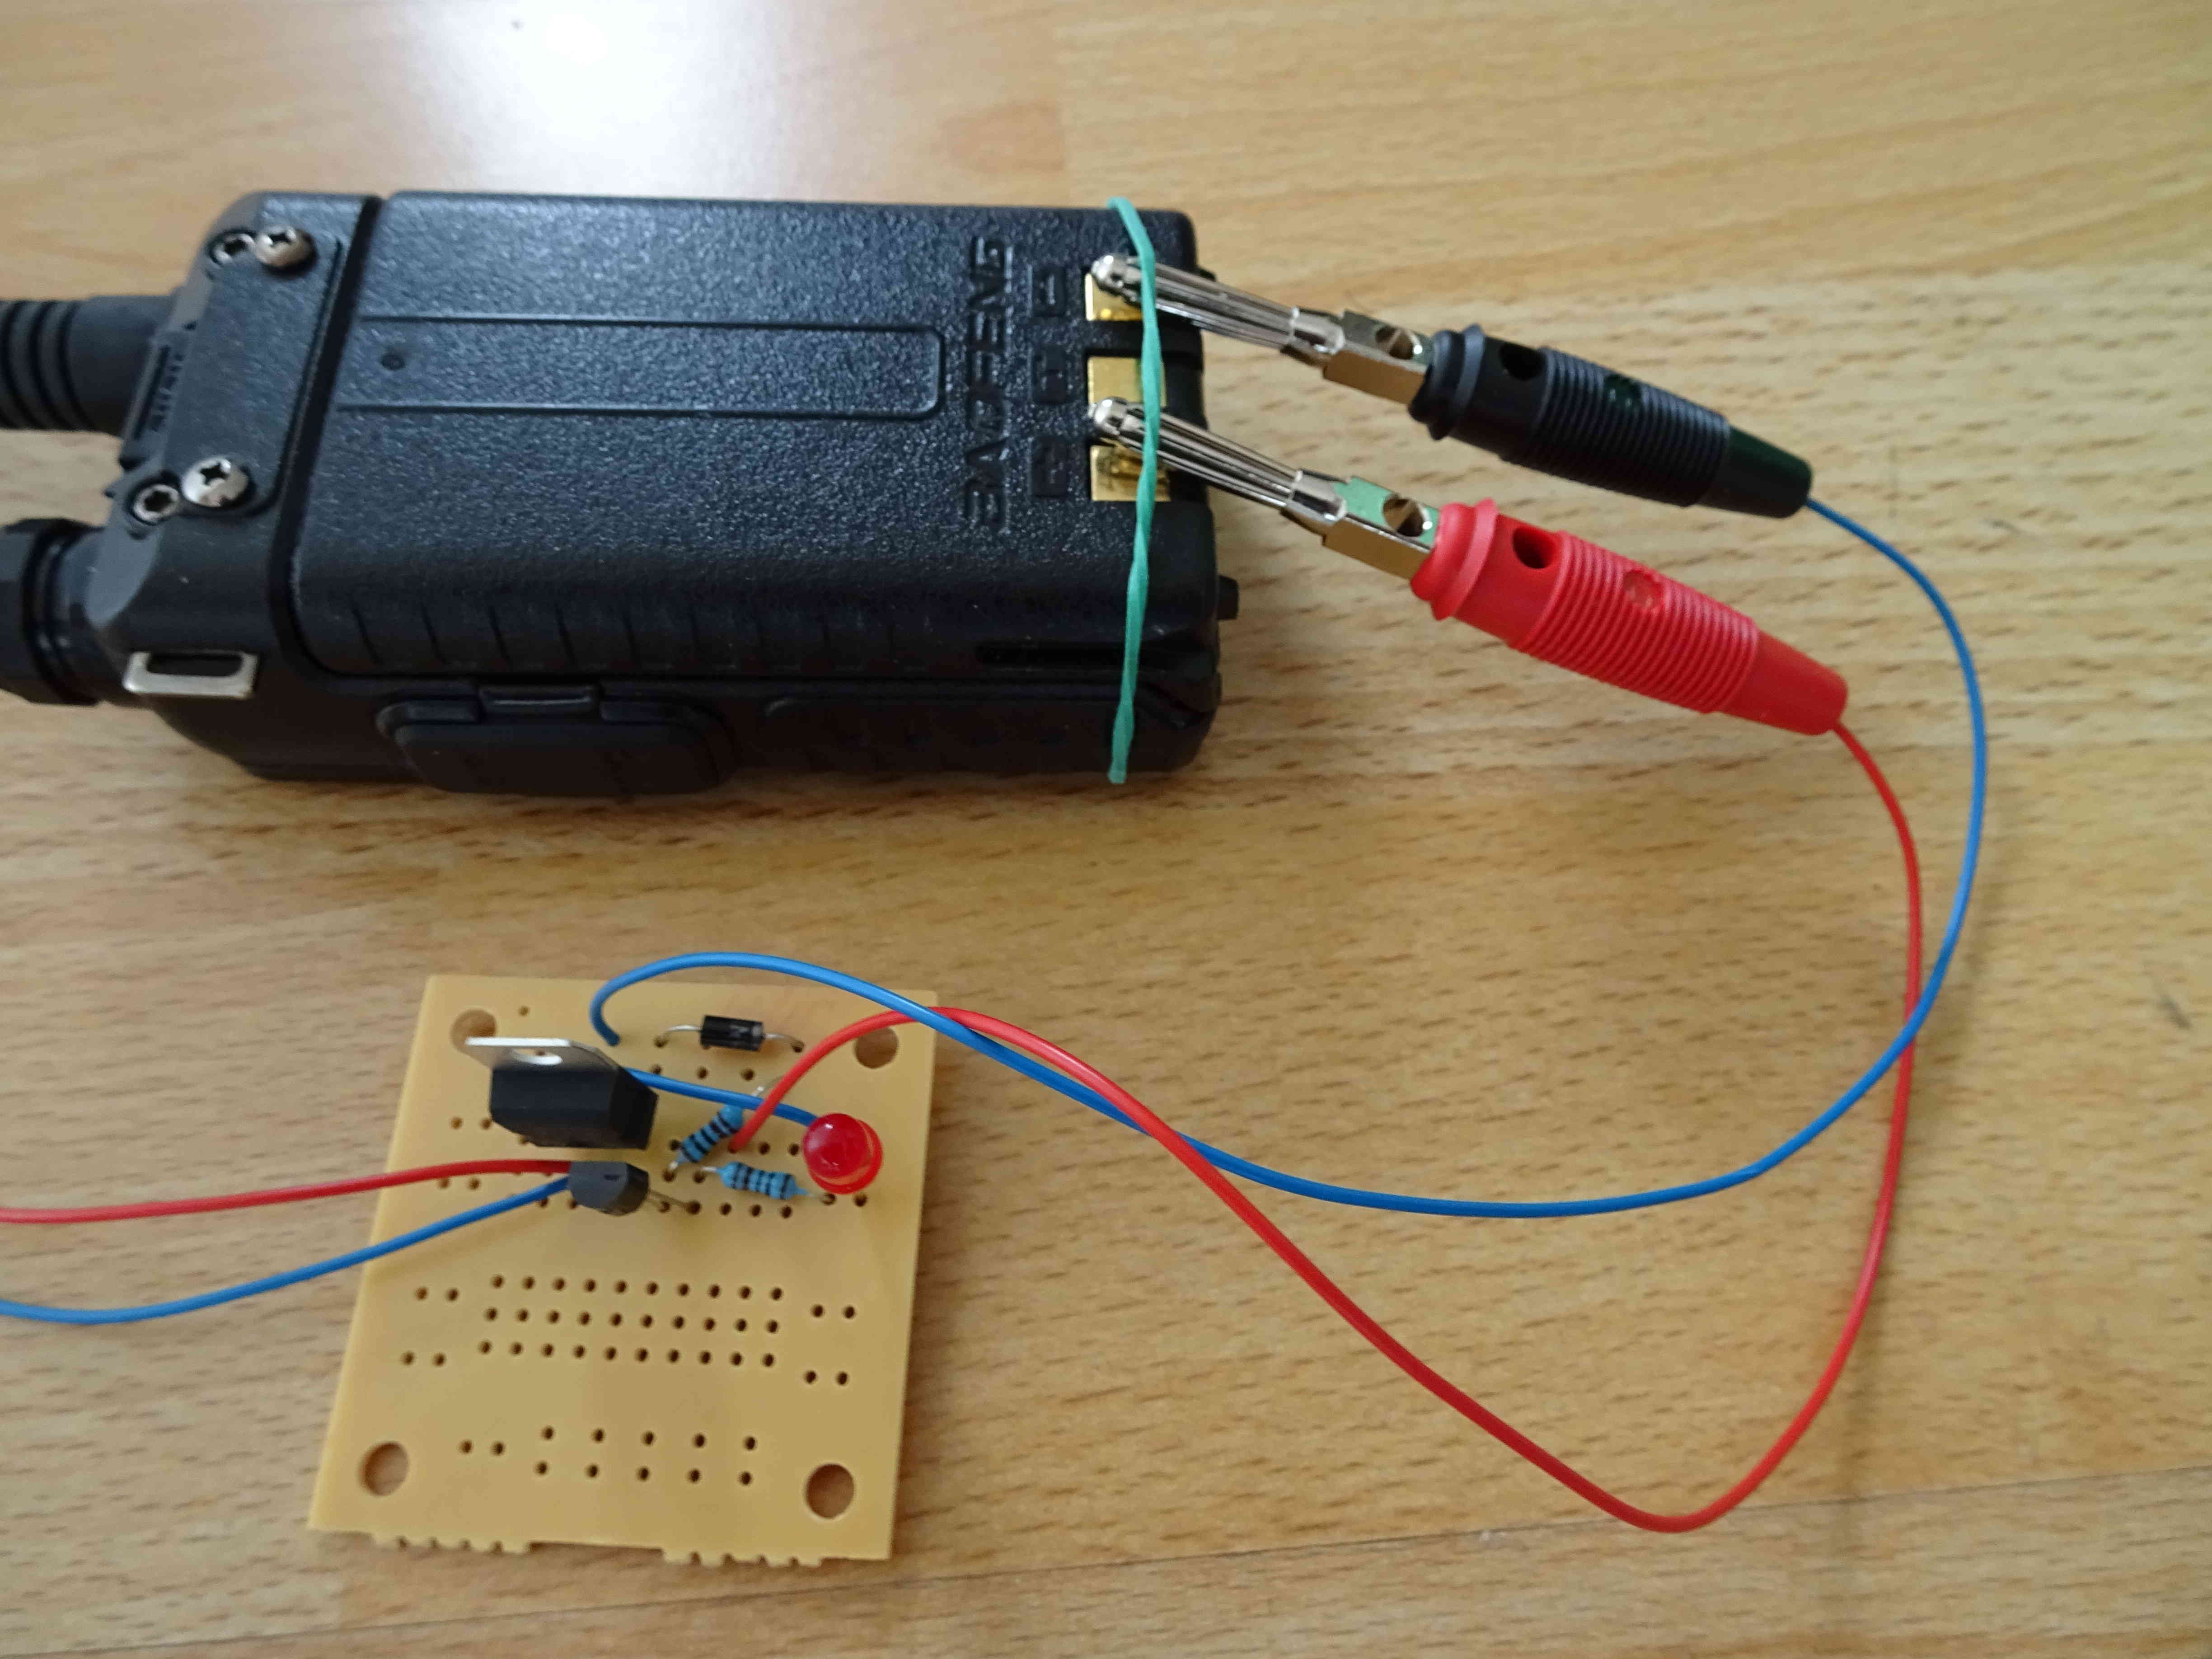
I connected the Baofeng battery using red (+) and black (-) banana plugs, fastened to the battery using a small rubber band, as can be seen in the next picture. As a power supply I used a universal power supply with 12V and 1A, but the original power Baofeng supply with 10V and 500 mA should also work, as well as similar ones.
Usage of the charger
Connect the banana plugs of the charger to the accoringls labeled contacts of the Baofeng battery, the connect the power supply. In the beginning the voltage regulator and diode become warm, but that is normal and doesn’t last long. After about 4 to 5 hours of charging the charging LED gets more dim, and at that point the charging is mostly finished and the charger can be removed. This is almost the end of phase 1 charging. The charger can also be let connected to the battery, for days or longer, but it only increases the charge slightly, and in the end it is just maintaining the charge, it doesn’t overcharge. Unlike the original charger, the radio can also be let on. Because of its simplicity, the charger doesn’t get confused, and there will be no charging/discharging cycles.
Testing
I used a universal stabilized power supply at 12V and 1A. Begin of charging: 6.3V on the empty battery (the Baofeng indicator showed empty and its voice said “empty battery”): Charging current: 1.5A for about 1 Minute, then down to 600mA from the thermal limitation circuit of the LM7809 (to avoid its overheating). Temperature at LM7809: 130 Grad C, then continuously going down. After 1 hour: 80 deg C, at constant 600 mA, Diode: ca. 70 deg. C. (measured with an IR thermometer). After 2 hours: ca. 300 mA, temperature at LM7809: 70 deg. C. After ca. 3 hours: ca. 70mA, temp. at LM7809 and Diode ca. 30 deg. C. After 5 hours: 20 mA, temp.: 25 deg. C at Diode and Regulator. Voltage almost 8.3V. At this point the charger can be removed, but for testing I continued. During all this time, the battery is not getting any warmer, and indication of gentle charging of the battery. After 40 hours: Voltage: 8.4 V, current: 0.7mA.
The charging LED become relatively darker when the charging current falls below about 10mA, which correspond to 8.3V battery voltage. This is less than the full charging voltage of 8.4V, which is also more gentle on the battery than the original charger.
For the self discharge of Li-Ion batteries this is a good article: http://batteryuniversity.com/learn/article/elevating_self_discharge
Li-Ion loses 5% charge in the first 24h. For the Baofeng battery this is 5% of 1800mAh = 90 mAh, which corresponds to an average current of 90/24=3.75 mA. This means in the end (after 40 hours or so, when it reaches the end of phase 1) the charging current is less than the discharging current of the battery, which means there is no risk of overcharging. But it is better for the battery to not keep it fully charged all the time.
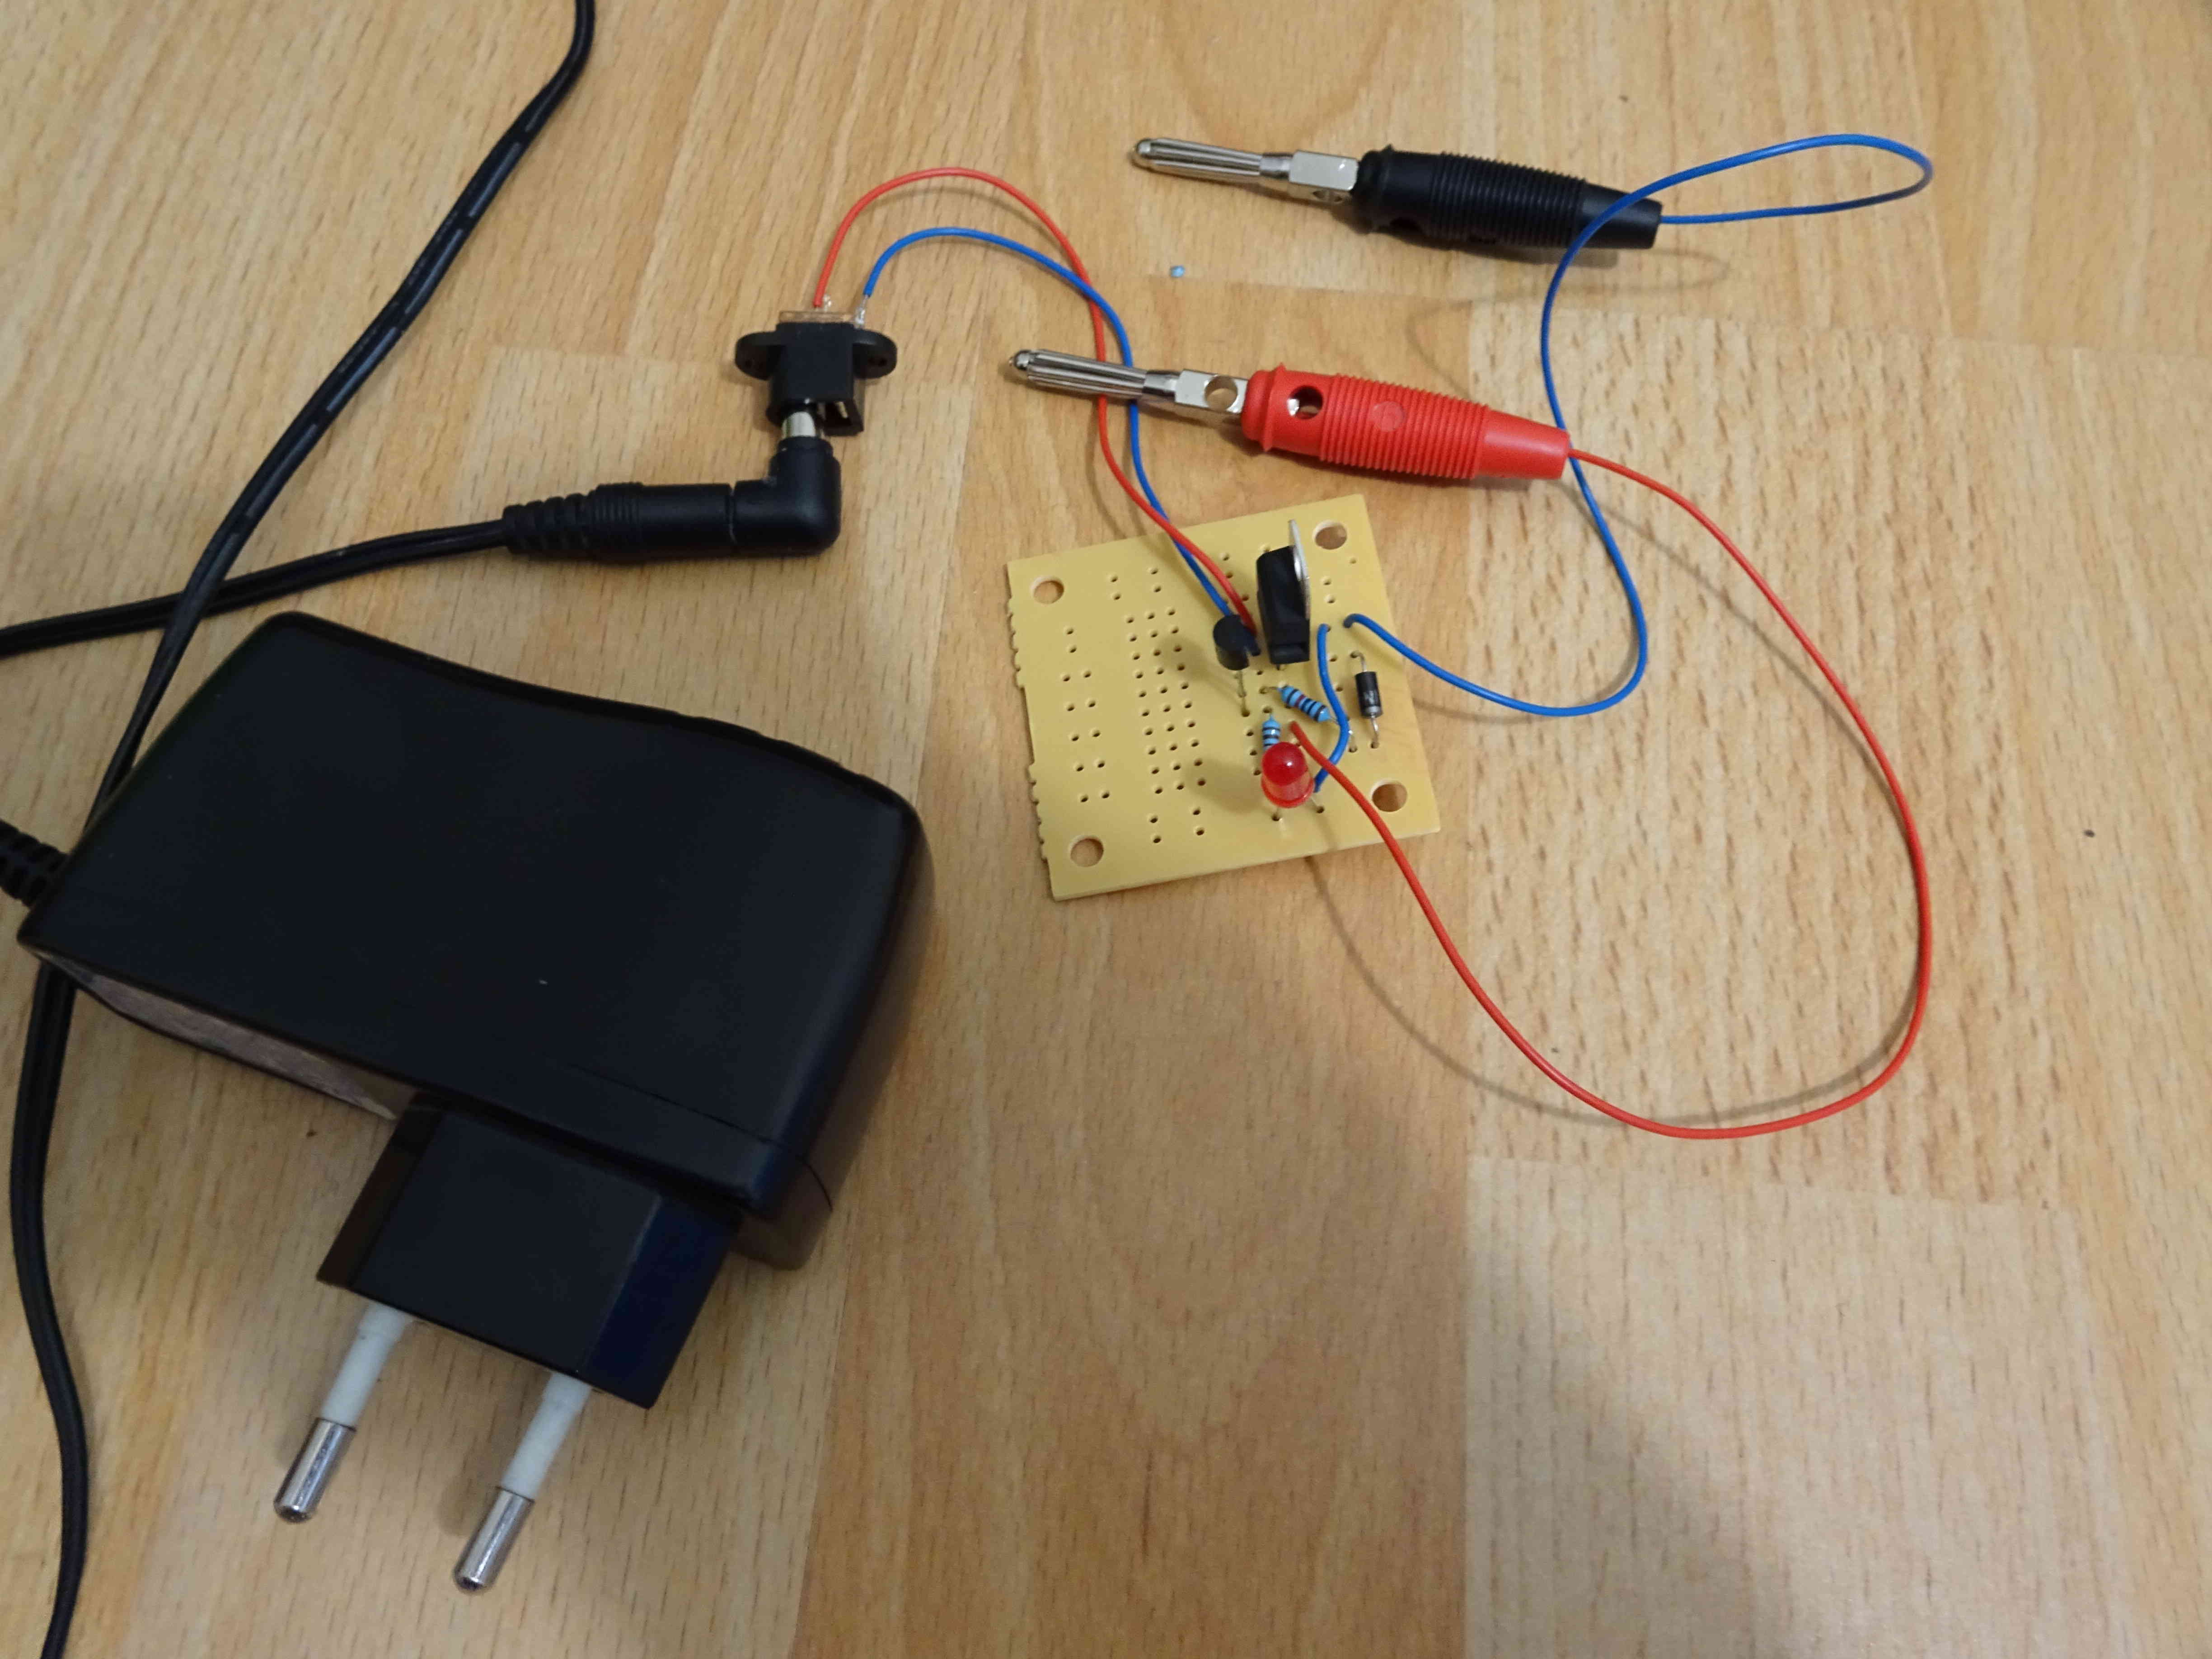 Simple Charger with universal power suppy